Index
- What is Google Shopping
- How Google Shopping works
- Requirements
- Creating an account for Google, Google Merchant Centre and Google Ads
- Adding products
- Mandatory product data
- Creating a Campaign
- Optimising a Google Shopping Campaign
- Conclusion

This article provides a comprehensive introduction for online retailers on advertising products through Google. It will guide you step-by-step in setting up essential accounts such as the Google Account, Google Merchant Centre, and Google Ads. You'll discover key considerations, product transfers to the Merchant Centre, and the process of initiating your inaugural Google Shopping campaign within Google Ads. Explore all these details in our guide to mastering Google Shopping.
What is Google Shopping
Google Shopping is a platform on which advertisers can insert their products, which, by the way, are positioned at the top of SERPs. This means that it's possible to give more visibility to one's products through targeted ads. As a matter of principle, this is Google Shopping's core. Let's take a look at how this can appear in practice when inserting "men's shoes" in a normal search on Google.

The first thing we see is the so-called Google Shopping snippet. The "sponsored" label tells us that we're talking about paid advertising. What is also noticeable in product-based searches is the arrangement of special searches. The shopping search is the first to be found here. By clicking on it, you will find yourself in the Google shopping area. Here you can also see all the search filters, such as colour, brand, type, design, size, etc. This allows you to find the shoes you need quickly and efficiently. But what happens when you click on a specific product?

As you can see, by passing the mouse, you obtain further details, but you will not be able to buy the shoe. If you click on the product, you will be redirected to the corresponding website.
How Google Shopping works
Google Shopping doesn't act as a shop or online marketplace. Instead, it acts like a product search engine or a price comparison portal. If you insert a specific model and use the filter function "Sort by: ascending price", you will see at the top the cheapest supplier for this model. Ultimately, Google Shopping's snippet works in exactly the same way. You will see general information, and when you click on a product, you'll be redirected to the shop where you can order the shoes as you would normally do.
Who can take advantage of Google Shopping? Essentially, everyone who sells products, whether in an e-commerce or physical shop, doesn't matter. So, tangible products is the key word, because the sale of services, digital products, and products prohibited by Google Ads policies is prohibited.
But what are the requirements you have to satisfy in order to advertise your products?
Requirements
First, it's necessary to have a Google account. If you already have a Gmail address, you automatically have a Google account. The same is true if you have an account you use to access YouTube. Also, this one is automatically a Google account. Otherwise, we will shortly show you how to create one. This is essentially your basic account. Starting with your basic account, you must then create an account for the Merchant Center. You can think of this account as a digital warehouse. This means that your products are stored and managed here. Although a Google Merchant account is necessary, it still does not give you the possibility to display Google Shopping ads. And that is where your Google Ads account comes into play, with which you can insert all kinds of ads. Both accounts must be linked in order to be able to advertise specifically for products stored in the Merchant Centre. We will shortly show you how to do this. But to be on the same page, we first guide you in creating the respective accounts. Let's start with the Google account.
Creating an account for Google, Google Merchant Centre and Google Ads
The simplest way to find the right page is to enter 'Create Google Account' in a Google search or directly from here. Choose whether to use the account as a private individual or as a company. Fill in all the data required to create your account and finally accept the terms and conditions: your Google account has been created. Now we are in our Google account, and from here we can access all the other areas, like Google Shopping, which for the moment we can only use as a user.
For this reason, let's go straight to creating an account for the Merchant Center. Registration is also free here. If you try to access the Google Merchant Center with your Google Ads account, you may see this screen:

From here, simply click on "Sign up for Merchant Center" and enter the requested data. The full information you will need to enter can be found on the official Google page. So, once you have entered the following information: your business, where you want to charge your customers, the third-party platforms you use, and your email preferences, you can finally access your Merchant Center. Remember that you will be offered the option of linking Google Shopping with Google Ads, but in our example we have not yet created the latter.
The image you see below is the Merchant Center dashboard of one of our customers for whom we are running Google Shopping campaigns:

As you can see, the Merchant Center is very simple and clearly structured. First of all, there is the general 'Overview' containing tabs for each Google Merchant feature. Below we have the 'Products' section, from which you can manage and optimise your product feed. The product feed is a file containing detailed information about your products, such as price, availability, description and pictures. "Performance" allows you to access the dashboard to get a snapshot of your performance, create and download reports or access the competitive scenario section. The 'Marketing' section allows you to set up promotions and monitor the progress of your active Shopping campaigns (the precondition is, of course, that you have connected your Merchant Centre to your Google Ads account; we'll get to that shortly). Finally, 'Growth' gives you access to various information, i.e., the opportunities you could implement, your price competitiveness, which are your best-selling products and the shopping experience scorecard.
Now that we have seen how the Merchant Centre is structured, what do we need to be able to place Shopping Ads? A Google Ads account. So let's create one finally. By logging into Google Ads you will see a screen similar to this one:
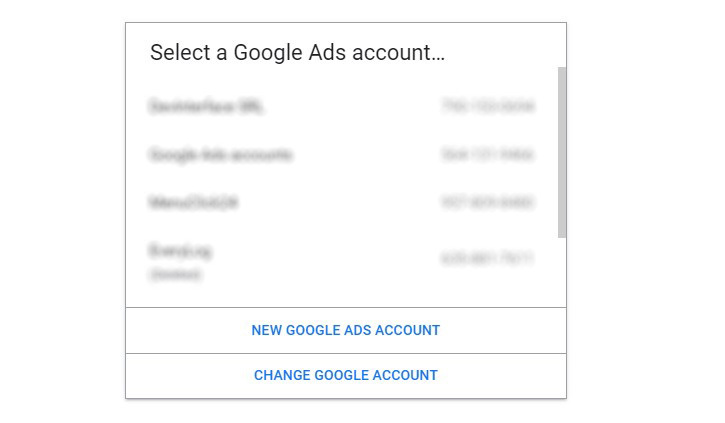
Click on 'New Google Ads Account' and follow the instructions. You will be asked to use either Smart or Expert mode to create an account. The expert mode is recommended for those who work in marketing and advertising and already have experience with online campaign management; if you are a beginner, choose the smart mode. Unlike expert mode, the creation of the smart account requires you to set up an initial campaign right from the start. Don't worry, if you don't want to activate the campaign, you can deactivate or pause it immediately after creating it by following the various steps. What you are interested in right now is creating the account and entering all the necessary information for it to work properly. You can find all the necessary information on the following official support page.
Once you have successfully created your Google Ads account, you can finally connect it to the Merchant Center (N.B. if you are not in charge of this directly, remember that the user must be an administrator in order to do this).
Let us return to the Merchant Center and from the settings go to 'Linked accounts' and then choose 'Google ads'.

In this section you will see your Google ads account and have the possibility to link it to the Merchant Centre. To find out if it is the right one, use your Google Ads customer ID, i.e. the 10-digit number you find in the top right-hand corner of your Google ads account. Then click on 'Link'.
In our example, we see that both are linked and the status has been set to active. To check this again in the Ads account, simply click on 'Tools and Settings' and on 'Linked Accounts'. Here too, the link is visible.

Merchant Center linked account

Google Ads linked account
Adding products
Now that we have activated the various accounts and connected the Merchant Center to Google Ads comes the crucial part: adding products. Two options are available here. If you are a small merchant with 1-2 products and do not want to add more products to your range in the future, you can add them individually in the Merchant Center. To do so, click on 'Products' and 'Add Product'. You can already see the mandatory details because they are marked with an asterisk. These include, for example, the country of destination and the title, which will also be shown in the SERPs. The link to your product in the shop, a link to the image and the price.
However, this method has many disadvantages for large retailers. Firstly, it is unnecessary to invest time in this operation, and secondly, it can happen, for example, that shop images are changed. However, this method has many disadvantages for large retailers. Firstly, it is unnecessary to invest time in this operation, and secondly, it can happen, for example, that shop images are changed. In such case, they would have to be manually changed over again in Google Shopping. A continuous feed of product data would therefore be much better. Under 'Products', you will find the 'Feeds' entry where you can create one or more primary feeds and also supplemental feeds. To learn more about feeds, we recommend you take a look at this guide.
Mandatory product data
After you have entered the products you must ensure that all information is correct. Google Merchant Centre can point out any errors or warnings that need to be corrected. This part is extremely important because the absence of a data set or its incorrect loading can have a very negative impact on your Google Shopping campaigns. We have discussed this topic in detail in the article 'The biggest mistakes you can make with a Shopify shop in Google Shopping', which we invite you to read. Here we briefly go over what product data specifications should be entered.
The following data are mandatory for basic products:
- Product ID (possibly SKU code)
- Title
- Description
- Product Link
- Product Image Link
- Availability
- Availability date
- Price
The following data are mandatory for the product ID:
- Brand
- Global Trade Item Number (GTIN)
- Manufacturer Part Number (MPN)
There are also a number of data items that may or may not be mandatory depending on the type of product. Double-check your data entry and make sure you always follow the guidelines.
Creating a Campaign
We have finally arrived at the creation of a Shopping campaign. This is to be activated directly in the Google Ads account, by clicking on 'Campaigns'. With the plus sign, we create a new campaign and receive some preset options, depending on our objective:

In the case of our client, the objective was an increase in sales, so we selected 'Sales'. If you select this objective, you will see the conversion goals and the campaign type, among which is also Shopping:

Once you have selected the Shopping type, the window for selecting the connected Merchant Centre account and the campaign sub-type will appear. You can choose between the Performance MAX campaign and Standard Shopping campaign. Performance Max campaigns exploit AI to help find customers who convert across all Google channels. This means that in a single campaign, you appear in all Google placements (YouTube, Disply, Search, Discover, Gmail and Maps). In this mode, it is the algorithm that chooses which positioning is best for your business. We advise against using this option if your advertising account is new and has never generated any conversions, you have a small budget and you plan to run other campaigns that could compete with the max performance campaign. Instead, aim for a standard Shopping campaign to get started.

Once you have clicked on 'Continue', a new screen will open in which you will find several sections to fill in. To begin with, you must enter the name of your campaign and you can set three additional options as required: inventory filter, local products and campaign URL options. The inventory filter allows you to select specific products that will be displayed in the campaign. If you are an e-commerce store that sells products from different brands, you may be interested in creating a Shopping campaign for only one or more specific brands, but if you wish to advertise your entire inventory, then this option should be left untouched. You can also choose to activate local products so that you can use the ads to promote products that are also present in your physical shops. The URL options allow you to specify precise parameters for tracking who clicks on your ad.
Regarding the section 'Offers and budgets' you will find three options: target ROAS (Return on Advertising Spend), maximise clicks - both automated options - and finally manual CPC (Cost per Click). With a new account and with no data on conversions, we advise you to start with the manual CPC. You can always consider giving yourself a period of time to see how the CPC develops and then later change the campaign bidding strategy. If you sell products with different price ranges, you should also select the option 'optimise for conversion value'. The next step is to enter the daily budget for your campaign.
Keep in mind that online advertising is expensive, so the less budget you invest, the less results and conversions you will get, not to mention that you may get absolutely unsuccessful campaigns. For this type of campaign, we therefore recommend that you start with a daily budget of between 11-15 dollars.
The last part of this section is 'Campaign Priority'. If you promote a product on several campaigns, you can decide which priority to assign to this campaign. If, on the other hand, you only intend to activate one Shopping campaign, you can set the campaign priority to its default value, i.e. low.

The next section concerns targeting, creating an ad group and defining your CPC value. In targeting, by default, Google places a tick on the inclusion of Google search partners in your campaign, i.e., non-Google websites that have created a sponsorship. If you leave this checked, your ad will also be shown on those sites when relevant searches are made. We advise against this option, especially if you do not have a particularly high budget, because your aim should be to maximise your budget so that potential buyers see your products on the Shopping feed. Under 'Locations' you select the target locations you are interested in, while under 'Start and end date' you can decide that the campaign starts and ends on specific dates.
In ad group creation, you will name your ad group and enter a value for your CPC. We already know what you are wondering: how do I choose the CPC value? If this is your very first campaign, we suggest you think about your business and how much the sale of your products is worth. If, for example, you sell luxury products, your CPC will certainly be higher than that of someone who sells products with a lower price range. You could try using some of the tools that Google provides to do a bit of research and see, for instance, the value of your CPC depending on specific keywords with the Keyword Planner,or, you could make estimates with the bid, budget and target simulator. Once you have entered your CPC, always keep an eye on it, especially in the first 48-72 hours after publishing your ad, because if you do not get any impressions, you will have to increase its value. If, on the other hand, you are getting too many impressions and are literally burning up your budget, then you will have to decrease its value.

Congratulations, if you have clicked on 'create campaign' you have finally generated your first Google Shopping campaign! Now what?
Optimising a Google Shopping Campaign
Now that we have created a Shopping campaign with all products from the Merchant Center, we can optimise the campaign by creating subdivisions so that we can display data for each individual product. Go to 'Product groups' and click on the + symbol. Generally, "Item ID" should be selected, which extracts the ID of each individual product so that you can click on it and see which products are actually bringing in clicks, conversions or revenue and which ones are not performing so well.

Another quick tip for campaign optimisation. According to how many SKU codes or products you have, you will probably want to set up multiple shopping campaigns and the main reason why you should do this is because of the variability of your product prices. However, if the prices are more or less the same, you could keep all products in one shopping campaign, but if you have different prices, it would be better to separate the products.
You could also include a set of negative keywords from the very beginning, so that your campaign is not shown for specific terms or terms that you know do not convert for your business but are similar.
The 'Audience Segments' section may be useful for adding audiences to your campaigns in order to collect more data on what actually performs. You can do this as 'Observation', which means that you do not restrict the scope of your campaigns with this option. To tailor offers, select each segment, so that you can make offers for a specific segment. If you select 'Targeting', it means that you are only targeting that specific group and could lose traffic.
Conclusion
We hope that this detailed guide to Google Shopping has provided a comprehensive and clear overview on how to start a successful campaign. From understanding what Google Shopping is to the necessary requirements, from activating accounts to uploading products to the Merchant Centre, to creating and optimising your campaign on Google Ads, we have covered every step in detail.
We are aware that running a Google Shopping campaign can take a considerable amount of time and effort, and here at DevInterface we can offer our experience and expertise to simplify this process for you. Our specialised team can take care of all aspects of your Google Shopping campaign, from initial set-up to ongoing optimisation, ensuring that your online presence is maximised and that you reach your target audience effectively.
Trust DevInterface to professionally create and manage your Google Shopping campaigns, allowing you to focus on developing your business while we maximise the visibility and performance of your products. Contact us today to discuss your specific needs and begin your growth in the online marketplace through Google Shopping.


.jpg)


